Hello there. How are you?
Isn't our perspective of time funny sometimes? You know as in - funny-strange! I was talking to a colleague and he said something to the effect that we needed to have a skype call at the end of the month. I immediately think - oh OK, sure, that's some time away.... then I looked in my diary and NO! it's next week!!!! People say time flies but when did it start to just evaporate??
At the weekend I managed to spend some time in my crafty space. I enjoyed just pottering around and doing some sorting and organising as well as also making a couple of cards.
This is the first of those that I am able to show you. Frits my lovely husband set up my camera so I was able to create a short YouTube video which I have linked to this blog. I haven't created any videos for about a year simply because I didn't have a video camera. The one Frits had has a wide angle lens so it will take me some time to get used to using it.
Here's my card:

I used some white cardstock and die cut the outer part of the Canadian Collection Background die. This really informs the size of the card.
I pierced the edges using a Tim Holtz ruler and pokey tool.
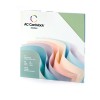
I backed it using a piece of this lovely lilac cardstock from the American Crafts pack that I have.
I added foam tape behind this and placed it on another pierced mat layer.
Little pearls were added to the centre of the flowers on the frame. to add little dimension.

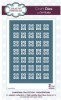
I stamp all four parts of the Marianne Design stamp as one piece using a purple stazon ink pad onto a piece of white card stock. Once stamped I use the die again to provide a means of knowing where to fussy cut it out to fit into the space in the centre of the flower frame.

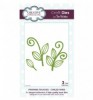
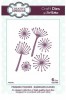
The flowers were made using the Sue Wilson foldover dies and the same coloured cardstock as used in the main card. I also used the Dandelion clocks dies, colouring the ends with copic pens. as well as adding a couple of leaves.

At the bottom of the card I made a little sentiment. It's a JustRite Stamp (is anyone else devastated that they are closing????) black memento ink pad with the stamp image cut out, added to white cardstock and fussy cut with some Armada paper shaper "Stamp" scissors.
As promised here is the YouTube clip that I also made of this card:
The main ingredients that I used to make this card were:
Thanks for stopping by to read today's blog, I have another couple of cards and some videos that match them to show you coming this way soon.
Isn't our perspective of time funny sometimes? You know as in - funny-strange! I was talking to a colleague and he said something to the effect that we needed to have a skype call at the end of the month. I immediately think - oh OK, sure, that's some time away.... then I looked in my diary and NO! it's next week!!!! People say time flies but when did it start to just evaporate??
At the weekend I managed to spend some time in my crafty space. I enjoyed just pottering around and doing some sorting and organising as well as also making a couple of cards.
This is the first of those that I am able to show you. Frits my lovely husband set up my camera so I was able to create a short YouTube video which I have linked to this blog. I haven't created any videos for about a year simply because I didn't have a video camera. The one Frits had has a wide angle lens so it will take me some time to get used to using it.
Here's my card:

I used some white cardstock and die cut the outer part of the Canadian Collection Background die. This really informs the size of the card.
I pierced the edges using a Tim Holtz ruler and pokey tool.
I backed it using a piece of this lovely lilac cardstock from the American Crafts pack that I have.
I added foam tape behind this and placed it on another pierced mat layer.
Little pearls were added to the centre of the flowers on the frame. to add little dimension.

I stamp all four parts of the Marianne Design stamp as one piece using a purple stazon ink pad onto a piece of white card stock. Once stamped I use the die again to provide a means of knowing where to fussy cut it out to fit into the space in the centre of the flower frame.

The flowers were made using the Sue Wilson foldover dies and the same coloured cardstock as used in the main card. I also used the Dandelion clocks dies, colouring the ends with copic pens. as well as adding a couple of leaves.

At the bottom of the card I made a little sentiment. It's a JustRite Stamp (is anyone else devastated that they are closing????) black memento ink pad with the stamp image cut out, added to white cardstock and fussy cut with some Armada paper shaper "Stamp" scissors.
As promised here is the YouTube clip that I also made of this card:
The main ingredients that I used to make this card were:
 |  |  |  | |
 |  |  | ||
 |  | |||
 |  |
Thanks for stopping by to read today's blog, I have another couple of cards and some videos that match them to show you coming this way soon.
what a gorgeous card Sally-ann. i would love to see how to make the flowers. they are lovely. the sentiment is lovely too. best wishes.
ReplyDeleteHi Pearl, Sue Wilson shows you how to make this flower in her Youtube clip which you can get to using this link Copy this to your web browser: https://www.youtube.com/watch?v=wAplaTAw7CY
ReplyDeleteHere she shows how to make them using felt, I used the same process just using cardstock. Hope this helps.
thank you Sally-ann. i will have a look.
ReplyDelete